Shallow Thoughts : : May
Akkana's Musings on Open Source Computing and Technology, Science, and Nature.
Wed, 30 May 2012
In a previous article I wrote about
how
to use stdeb to turn a Python script
into source and binary Debian/Ubuntu packages.
You can distribute a .deb file that people can download and install;
but it's a lot easier for people to install if you set up a repository,
so they can get automatic updates from you.
If you're targeting Ubuntu, the best way to do that is to set up a
Launchpad Personal
Package Archive, or PPA.
Create your PPA
First, create your PPA.
If you don't have a Launchpad account yet,
create one, add a GPG key, and sign the Code of Conduct.
Then log in to your account and click on Create a new PPA.
You'll have to pick a name and a display name for your PPA.
The default is "ppa", and many people leave personal PPAs as that.
You might want to give it a display name of yourname-ppa
or something similar if it's for a collection of stuff;
or you're only going to use it for software related to one program or
package, name it accordingly.
Ubuntu requires nonstandard paths
When you're creating your package with stdeb,
if you're ultimately targeting a PPA, you'll only need the souce dsc
package, not the binary deb.
But as you'll see, you'll need to rebuild it to make Launchpad happy.
If you're intending to go through the
Developer.ubuntu.com
process, there are specific requirements for version
numbering and tarball naming -- see "Packaging" in the
App
Review Board Guidelines.
Your app will also need to install unusual locations --
in particular, any files it installs, including the script itself,
need to be in
/opt/extras.ubuntu.com/<packagename> instead of a more
standard location.
How the user is supposed to run these apps (run a script to add
each of /opt/extras.ubuntu.com/* to your path?) is not clear to me;
I'm not sure this app review thing has been fully thought out.
In any case, you may need to massage your setup.py accordingly,
and keep a separate version around for when you're creating the
Ubuntu version of your app.
There are also apparently some
problems
loading translation files for an app in /opt/extras.ubuntu.com
which may require some changes to your Python code.
Prepare and sign your package
Okay, now comes the silly part. You know that source .dsc package
you just made? Now you have to unpack it and "build" it before you
can upload it. That's partly because you have to sign it
with your GPG key -- stdeb apparently can't do the signing step.
Normally, you'd sign a package with
debsign deb_dist/packagename_version.changes
(then type your GPG passphrase when prompted).
Unfortunately, that sort of signing doesn't work here.
If you used stdeb's bdist_deb to generate both binary and
source packages, the .changes file it generates will contain
both source and binary and Launchpad will reject it.
If you used sdist_dsc to generate only the source package,
then you don't have a .changes file to sign and submit to Launchpad.
So here's how you can make a signed, source-only .changes file
Launchpad will accept.
Since this will extract all your files again, I suggest doing this in
a temporary directory to make it easier to clean up afterward:
$ mkdir tmp
$ cd tmp
$ dpkg-source -x ../deb_dist/packagename_version.dsc
$ cd packagename_version
Now is a good time to take a look at the
deb_dist/packagename_version/debian/changelog that stdeb created,
and make sure it got the right version and OS codename for the
Ubuntu release you're targeting -- oneiric, precise, quantal or whatever.
stdeb's default is "unstable" (Debian) so you'll probably need to change it.
You can cross-check this information in the
deb_dist/packagename_version.changes file, which is the file
you'll actually be uploading to the PPA.
Finally, build and sign your source package:
$ debuild -S -sa
  [type your GPG passphrase when prompted, twice]
$ dput ppa:yourppa ../packagename_version_source.changes
Upload the package
Finally, it's time to upload the package:
$ dput ppa:your-ppa-name deb_dist/packagename_version.changes
This will give you some output and eventually probably tell you
Successfully uploaded packages.
It's lying -- it may have failed. Watch your inbox
for messages. If Launchpad rejects your changes, you should get an
email fairly quickly.
If Launchpad accepts the changes, you'll get an Accepted email.
Great! But don't celebrate quite yet. Launchpad still has to build
your package before it can be installed. If you try to add your PPA
now, you'll get a 404.
Wait for Launchpad to build
You might as well add your repository now so you can install from it
once it's ready:
$ sudo add-apt-repository ppa:your-ppa-name
But don't apt-get update yet!
if you try that too soon, you'll get a 404, or an Ign meaning
that the repository exists but there are no packages in it for
your architecture.
It might be as long as a few hours before Launchpad builds your package.
To keep track of this, go to your Launchpad PPA page (something like
https://launchpad.net/~yourname/+archive/ppa) and look under
PPA Statistics for something like "1 package waiting to build".
Click on that link, then in the page that comes up, click on the link
like i386 build of pkgname version in ubuntu precise RELEASE.
That should give you a time estimate.
Wondering why it's being built for i386 when Python should be
arch independent? Worry not -- that's just the architecture that's
doing the building. Once it's built, your package should install anywhere.
Once the Launchpad build page finally says the package is built,
it's finally safe to run the usual apt-get update.
Add your key
But when you apt-get update you may get an error like this:
The following signatures couldn't be verified because the public key is not available: NO_PUBKEY 16126D3A3E5C1192
Obviously you have your own public key, so what's up?
You have to import the key from Ubuntu's keyserver,
and then export it into apt-key, before apt can use it --
even if it's your own key.
For this, you need the last 8 digits given in the NO PUBKEY message.
Take those 8 digits and run these two commands:
gpg --keyserver keyserver.ubuntu.com --recv 3E5C1192
gpg --export --armor 3E5C1192 | sudo apt-key add -
I'm told that apt-add-repository is supposed to add the key automatically,
but it didn't for me. Maybe it will if you wait until after your package
is built before calling apt-add-repository.
Now if you apt-get update, you should see no errors.
Finally, you can apt-get install pkgname.
Congratulations! You have a working PPA package.
Tags: ubuntu, linux, programming
[
13:34 May 30, 2012
More programming |
permalink to this entry |
]
Sat, 26 May 2012
I write a lot of little Python scripts. And I use Ubuntu and Debian.
So why aren't any of my scripts packaged for those distros?
Because Debian packaging is absurdly hard, and there's very little
documentation on how to do it. In particular, there's no help on how
to take something small, like a Python script,
and turn it into a package someone else could install on a Debian
system. It's pretty crazy, since
RPM
packaging of Python scripts is so easy.
Recently at the Ubuntu Developers' Summit, Asheesh of OpenHatch pointed me toward
a Python package called stdeb that simplifies a lot of the steps
and makes Python packaging fairly straightforward.
You'll need a setup.py file to describe your Python script, and
you'll probably want a .desktop file and an icon.
If you haven't done that before, see my article on
Packaging Python for MeeGo
for some hints.
Then install python-stdeb.
The package has some requirements that aren't listed
as dependencies, so you'll need to install:
apt-get install python-stdeb fakeroot python-all
(I have no idea why it needs python-all, which installs only a
directory
/usr/share/doc/python-all with some policy
documentation files, but if you don't install it, stdeb will fail later.)
Now create a config file for stdeb to tell it what Debian/Ubuntu version
you're going to be targeting, if it's anything other than Debian unstable
(stdeb's default).
Unfortunately, there seems to be no way to pass this on the command
line rather than in a config file. So if you want to make packages for
several distros, you'll have to edit the config
file for every distro you want to support.
Here's what I'm using for Ubuntu 12.04 Precise Pangolin:
[DEFAULT]
Suite: precise
Now you're ready to run stdeb. I know of two ways to run it.
You can generate both source and binary packages, like this:
python setup.py --command-packages=stdeb.command bdist_deb
Or you can generate source packages only, like this:
python setup.py --command-packages=stdeb.command sdist_dsc
Either syntax creates a directory called deb_dist. It contains a lot of
files including a source .dsc, several tarballs, a copy of your source
directory, and (if you used bdist_deb) a binary .deb package.
If you used the bdist_deb form, don't be put off that
it concludes with a message:
dpkg-buildpackage: binary only upload (no source included)
It's fibbing: the source .dsc is there as well as the binary .deb.
I presume it prints the warning because it creates them as
separate steps, and the binary is the last step.
Now you can use dpkg -i to install your binary deb, or you can use
the source dsc for various purposes, like creating a repository or
a Launchpad PPA. But those involve a lot more steps -- so I'll
cover that in a separate article about creating PPAs.
Update: you can find that article here:
Creating
packages for a Launchpad PPA.
Tags: debian, ubuntu, linux, programming, python
[
11:44 May 26, 2012
More programming |
permalink to this entry |
]
Tue, 22 May 2012
![[Annular eclipse 2012]](http://shallowsky.com/images/annular-eclipse-2012/img_5308T.jpg) I've just seen the annular eclipse, and what a lovely sight it was!
I've just seen the annular eclipse, and what a lovely sight it was!
This was only my second significant solar eclipse, the first being a
partial when I was a teenager. So I was pretty excited about an
annular so nearby -- the centerline was only about a 4-hour drive from home.
We'd made arrangements to join the Shasta astronomy club's eclipse party
at Whiskeytown Lake, up in the Trinity Alps. Sounded like a lovely spot,
and we'd be able to trade views with the members of the local astronomy
club as well as showing off the eclipse to the public. As astronomers
bringing telescopes, we'd get reserved parking and didn't even have to
pay the park fee. Sounded good!
Not knowing whether we might hit traffic, we left home first thing in
the morning, hours earlier than we figured was really necessary.
A good thing, as it turned out.
Not because we hit any traffic -- but because when we got to the site,
it was a zoo. There were cars idling everywhere, milling up and
down every road looking for parking spots.
We waited in the queue at the formal site, and finally got to the
front of the line, where we told the ranger we were bringing
telescopes for the event. He said well, um, we could drive in and
unload, but there was no parking so we'd just have to drive out
after unloading, hope to find a parking spot on the road somewhere,
and walk back.
What a fiasco!
After taking a long look at the constant stream of cars inching along in
both directions and the chaotic crowd at the site, we decided the
better part of valor was to leave this vale of tears and high-tail it
back to our motel in Red Bluff, only little farther south of the
centerline and still well within the path of annularity. Fortunately
we'd left plenty of extra time, so we made it back with time to spare.
The Annular Eclipse itself
![[early stage of annular eclipse 2012, showing sunspots]](http://shallowsky.com/images/annular-eclipse-2012/img_5402T.jpg) One striking thing about watching the eclipse through a telescope was
how fast the moon moves. The sun was well decorated with several excellent
large sunspot groups, so we were able to watch the moon swallow them
bit by bit.
One striking thing about watching the eclipse through a telescope was
how fast the moon moves. The sun was well decorated with several excellent
large sunspot groups, so we were able to watch the moon swallow them
bit by bit.
Some of the darker sunspot umbras even showed something like a
black drop effect
as they disappeared behind the moon. We couldn't see the same
effect on the smaller sunspot groups, or on the penumbras.
![[black drop at end of annularity]](http://shallowsky.com/images/annular-eclipse-2012/img_5412T.jpg) There was also a pronounced black drop effect at the onset and end
of annularity.
There was also a pronounced black drop effect at the onset and end
of annularity.
The seeing was surprisingly good, as solar observing goes. Not only
could we see good detail on the sunspot groups and solar faculae,
but we could easily see irregularities in the shape of the moon's
surface -- in particular one small sharp mountain peak on the leading edge,
and what looked like a raised crater wall farther south on that
leading edge. We never did get a satisfactory identification on
either feature.
![[pinhole eclipse viewing]](http://shallowsky.com/images/annular-eclipse-2012/img_5287T.jpg) After writing and speaking about eclipse viewing, I felt honor bound
to try viewing with pinholes of several sizes. I found that during early
stages of the eclipse, the pinholes had to be both small (under about
5 mm) and fairly round to show much. Later in the eclipse,
nearly anything worked to show the crescent or the annular ring,
including interlaced fingers or the shadow of a pine tree on the wall.
I wish I'd remembered to take an actual hole punch, which would have
been just about perfect.
After writing and speaking about eclipse viewing, I felt honor bound
to try viewing with pinholes of several sizes. I found that during early
stages of the eclipse, the pinholes had to be both small (under about
5 mm) and fairly round to show much. Later in the eclipse,
nearly anything worked to show the crescent or the annular ring,
including interlaced fingers or the shadow of a pine tree on the wall.
I wish I'd remembered to take an actual hole punch, which would have
been just about perfect.
![[binocular projection for eclipse]](http://shallowsky.com/images/annular-eclipse-2012//img_5283T.jpg) I also tried projection through binoculars, and convinced myself that
it would probably work as a means of viewing next month's Venus
transit -- but only with the binoculars on a tripod. Hand-holding
them is fiddly and difficult. (Of course, never look through
binoculars at the sun without a solar filter.) Look for an upcoming
article with more details on binocular projection.
I also tried projection through binoculars, and convinced myself that
it would probably work as a means of viewing next month's Venus
transit -- but only with the binoculars on a tripod. Hand-holding
them is fiddly and difficult. (Of course, never look through
binoculars at the sun without a solar filter.) Look for an upcoming
article with more details on binocular projection.
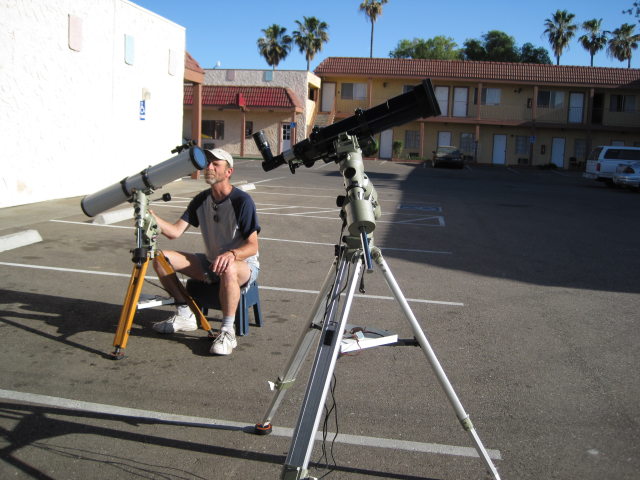
The cast of characters
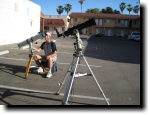 For us, the motel parking lot worked out great. We were staying at the
Crystal Motel in Red Bluff, an unassuming little motel that proved to be
clean and quiet, with friendly, helpful staff and the fastest motel
wi-fi connection I've ever seen. Maybe not the most scenic of
locations, but that was balanced by the convenience of having the car
and room so close by.
For us, the motel parking lot worked out great. We were staying at the
Crystal Motel in Red Bluff, an unassuming little motel that proved to be
clean and quiet, with friendly, helpful staff and the fastest motel
wi-fi connection I've ever seen. Maybe not the most scenic of
locations, but that was balanced by the convenience of having the car
and room so close by.
And we were able to show the eclipse to locals
and motel guests who wouldn't have been able to see it otherwise.
Many of these people, living right in the eclipse path, didn't even
know there was an eclipse happening, so poor had the media coverage been.
(That was true in the bay area too -- most people I talked to last week
didn't know there was an eclipse coming up, let alone how or where to
view it.)
We showed the eclipse to quite a cast of characters --
- The mother with medical problems, obviously feeling quite poorly
but still bringing her husband and son out for repeated views.
- the woman who said she didn't want to be in the sun because she'd
been drinking too much by the pool.
- The family where Dad kept looking through paper glasses the kids
insisted was a "3-D viewer". Alarmed, we took a look, and found it
was a perfectly reasonable eclipse viewer marked SAFE FOR SOLAR VIEWING.
Whew!
- The teen girl who kept looking directly at the sun despite everyone
telling her not to ... I hope she didn't damage her vision.
- The kid who wanted to borrow my binocular to look at some birds
circling in the distance. I wanted to let him, but with all the
attention on the sun I was too nervous, so instead I changed the
subject and showed him how to identify turkey vultures (wings in a V,
tipping from side to side) even without binoculars).
- The man who sat in a parking space near us reading a catalog,
telling us repeatedly he was just reading his catalog. When Dave
insisted he come and take a look, he looked in the eyepiece for about
ten seconds, then looked Dave in the eye and informed him solemnly
that he was just reading his catalog.
- The family who'd been instructed by their grandmother, in the hospital
awaiting an operation, to watch the eclipse and bring back pictures for her.
I hope they got some decent ones!
In between visitors, we had plenty of time to fiddle with equipment,
take photos, and take breaks sitting in the shade to cool down.
(Annularity was pleasantly cool, but the rest of the eclipse stayed
hot on an over 90 degree central valley day.)
There's a lot to be said for sidewalk astronomy! Overall, I'm glad
we ended up where we did rather than in that Whiskeytown chaos.
Here's my collection of
Images
from the "Ring of Fire" Annular Eclipse, May 2012, from Red Bluff, CA.
Tags: astronomy, science, eclipse, travel
[
11:42 May 22, 2012
More science/astro |
permalink to this entry |
]
Wed, 16 May 2012
![[Solar annular eclipse of January 15, 2010 in Jinan, Republic of China, by A013231 on Wikimedia Commons.]](http://shallowsky.com/blog/images/annular.JPG) This Sunday, May 20th, the western half of the US will be treated
to an annular solar eclipse.
This Sunday, May 20th, the western half of the US will be treated
to an annular solar eclipse.
Annular means that the moon is a bit farther away than usual, so it
won't completely cover the sun even if you travel to the eclipse
centerline. Why? Well, the moon's orbit around the earth
isn't perfectly circular, so sometimes it's farther away, sometimes
nearer. Remember all the hype two weeks ago about the "supermoon",
where it was unusually close at full moon? The other side of that
is that during this eclipse, at new moon, the moon is unusually far
away, and therefore a little smaller, not quite big enough to cover
the sun.
Since the sun will never be totally covered, make sure
you have a safe solar filter for this one -- don't look with your
naked eyes! You want a solar filter anyway, if you have any kind of
telescope or even binoculars, because of next month's once-in-a-lifetime
Venus transit (I'll write about that separately).
But if you don't have a solar filter and absolutely can't get one
in time, read on -- I'll have some suggestions later even for people
without any sort of optical aid.
But first, the path of the eclipse.
Here in the bay area, we're just a bit south of the southern limit of the
annular path, which passes just south of the town of Redway, through
Covelo, just south of Willows, then just misses Yuba City and
Auburn. If you want to be closer to the centerline, go camping at
Lassen National Park or Lake Shasta, or head to Reno or Tahoe
If you're inclined to travel, NASA has a great
interactive
2012 eclipse map you can use to check out possible locations.
Even back in the bay area, we still get a darn good dinner show. The partial
eclipse starts at 5:17 pm PDT, with maximum eclipse at 6:33. The sun
will be 18 degrees above the horizon at that point, and 89%
eclipsed. Compare that with 97% for a site right on the centerline --
remember, since this is an annular eclipse, no place sees 100%
coverage. The partial eclipse ends at 7:40 -- still well before
sunset, which isn't until 8:11.
Photographers, if you want a shot of an annular eclipse as the sun
sets, you'll need to head east, to Albuquerque, NM or Lubbock, TX.
A little before sunset, the centerline also crosses
near a lot of great vacation spots like Bryce, Zion and Canyon de Chelly.
![[eclipse viewed through leaves]](http://upload.wikimedia.org/wikipedia/commons/thumb/2/28/IMG_1650_zonsverduistering_Malta.JPG/320px-IMG_1650_zonsverduistering_Malta.JPG) I mentioned that even without a solar filter, there are ways of
watching the eclipse. The simplest is with a pinhole. You don't need
to use an actual pin -- the size and shape of the hole isn't critical,
as you can see in this
image
of the sun through the leaves of a tree during a 2005 eclipse in Malta.
If you don't have a leafy tree handy, you can even lace your fingers
together and look at the shadow of your hands. This eclipse will be
very low in the sky, continuing through sunset, so you may need to
project its shadow onto a wall rather than the ground.
I mentioned that even without a solar filter, there are ways of
watching the eclipse. The simplest is with a pinhole. You don't need
to use an actual pin -- the size and shape of the hole isn't critical,
as you can see in this
image
of the sun through the leaves of a tree during a 2005 eclipse in Malta.
If you don't have a leafy tree handy, you can even lace your fingers
together and look at the shadow of your hands. This eclipse will be
very low in the sky, continuing through sunset, so you may need to
project its shadow onto a wall rather than the ground.
If you have some
time to prepare, take a piece of cardboard and punch a few holes
through it. Try different sizes -- an actual pinhole, a BBQ skewer,
a 3-hole punch, maybe even bigger holes up to the size of a penny.
You might also try using aluminum foil -- you can get very clean
circular holes that way, which might give a crisper image.
Here's a good page on
eclipse
pinhole projection.
What works best? I don't remember! It's been a very long time since
the last eclipse here! Do the experiment! I know I will be.
![[Solar projection with a Dobsonian]](http://upload.wikimedia.org/wikipedia/commons/thumb/0/06/Home_made_dobsonian_user_to_make_a_solar_projection_%28Split%2C_Croatia%29_3.jpg/320px-Home_made_dobsonian_user_to_make_a_solar_projection_%28Split%2C_Croatia%29_3.jpg) If you do have a telescope or binoculars but couldn't get a solar
filter in time, don't despair. Instead of looking through the
eyepiece, you can project the sun's image onto a white screen or even
the ground or a wall. Use a cheap, low-power eyepiece -- any eyepiece
you use for solar projection will get very hot, and you don't want to
risk ruining a fancy one.
If you do have a telescope or binoculars but couldn't get a solar
filter in time, don't despair. Instead of looking through the
eyepiece, you can project the sun's image onto a white screen or even
the ground or a wall. Use a cheap, low-power eyepiece -- any eyepiece
you use for solar projection will get very hot, and you don't want to
risk ruining a fancy one.
Point the telescope at the sun -- it's easy to tell when it's
lined up by watching the shadow of the telescope -- and rotate the
eyepiece so that it's aimed at your screen, which can be as simple
as a sheet of paper. Be careful where that eyepiece is aimed -- make
sure no one can walk through the path or put their hand in the way,
and if you have a finderscope, make sure it's covered.
This solar projection method works with binoculars too, but you'll want
to mount them on a tripod so you don't have to hold them the whole time.
Of course, another great way to watch the eclipse is with your local
astronomy club. I expect every club in the bay area -- and there are a
lot of them -- will have telescopes out to share the eclipse with the
public. So check with your local club --
San Jose Astronomical Association,
Peninsula Astronomical Society,
San Francisco Sidewalk
Astronomers,
San Francisco Amateur Astronomers,
or any of the others on the AANC's list of
Amateur
Astronomy Clubs in Northern California
or the
SF
Chronicle's list of astronomy clubs.
This eclipse should be pretty cool -- and a great chance to test
out your solar equipment before next month's Venus transit.
When I went to put the event on my wall calendar last month, I discovered
the calendar already had an entry for May 20: it's the start of Bear
Awareness Week. So if you head up to Lassen or Shasta to watch the
eclipse, be sure to be aware of the bears! (Also, maybe I should get a
calendar that's a little more in tune with the sky.)
Tags: astronomy, science, eclipse
[
21:12 May 16, 2012
More science/astro |
permalink to this entry |
]
Sat, 12 May 2012
University of Chicago Press has a
Carl Zimmer book,
A Planet of Viruses, as their free monthly e-book.
I know Zimmer is a good writer. but the ebook, despite being free, is
encumbered with Adobe's version of DRM, which unlocks via a Windows
or Mac program. I use Linux, and wanted to read the book on a Nook.
Was I out of luck?
Happily, the instruction page they sent when I signed up
for the book helpfully included a section for Linux users. Hooray,
U. Chicago! It said Adobe Digital Editions will run under Wine,
the Windows emulator.
I'd been meaning to try that anyway, and a Carl Zimmer book seemed
like the perfect excuse.
And overall, it worked pretty well, with only a few snags.
Here are the steps I had to follow:
Authorizing a book using Adobe Digital Editions in Linux on Wine
Install wine (on Ubuntu, I used apt-get install wine).
Download the Adobe Digital Editions setup.exe
Run:
wine setup.exe
(this should install ADE inside your .wine directory)
Copy the file, e.g. URLLink.acsm, into .wine/drive_c/My\ Documents/
Don't bother trying to open it with ADE -- the program won't open
anything except PDF and epub. Curiously, the only ways to open the
file from ADE are to drag the file onto the ADE window or to pass
it as a commandline argument:
wine start .wine/drive_c/My\ Documents/URLLink.acsm
Now ADE should download your book and display it.
You can read it there, if you want. But you won't want to -- it's not
a good reading interface.
Authorizing a device with Adobe Digital Editions under Wine
Now how do you get it into your ebook reader?
ADE running under Wine doesn't recognize devices such as ebook readers.
so nothing will be copied automatically. But you can copy it manually.
- Plug in your ebook reader.
- Mount the device wherever you like -- /media/nook, /nook or whatever.
- With ADE not running (quit it if it's running),
map a drive letter to the mount point:
- Run winecfg
- Click the Drives tab
- Click Add...
- Choose a drive letter (I chose D:)
- Under Path: type in the mount point, like /nook
- Click Show Advanced
- Set the Type: to Floppy disk
- Click OK to save it
- Now the drive is mapped. Re-run ADE:
wine .wine/drive_c/Program\ Files/Adobe/Adobe\ Digital\ Editions/digitaleditions.exe
ADE should now see the device and ask you if you want to authorize it.
- In ADE, drag the chosen book onto the left sidebar entry for the device.
- umount the reader ... and now your new book should show up in the library.
In theory, the drive letter should stay mapped, so you should be able
to use it for opening future books.
Just remember to mount your device to the same location before
running ADE under wine.
Tags: ebook, DRM, tablet, nook
[ 11:03 May 12, 2012
More linux |
permalink to this entry |
]
Sun, 06 May 2012
I've mostly been enormously happy with my
upgrade from my old Archos 5 to the Samsung Galaxy Player 5.0.
The Galaxy does everything I always wanted the Archos to do,
all those things the Archos should have done but couldn't because
of its buggy and unsupported Android 1.6.
That is, I've been happy with everything except one thing: my
birdsong app no longer worked.
I have a little HTML app based on my "tweet" python script
which lets you choose from a list of birdsong MP3 files.
(The actual MP3 files are ripped from the excellent 4-CD
Stokes
Field Guide to Western Bird Songs set.)
The HTML app matches bird names as you type in characters.
(If you're curious, an earlier test version is at
tweet.html.)
On the Archos, I ran that under my
WebClient
Android app (I had to modify the HTML to add a keyboard, since in Android
1.6 the soft keyboard doesn't work in WebView text fields).
I chose a bird, and WebView passed off the MP3 file to the Archos'
built-in audio player. Worked great.
On the Samsung Galaxy, no such luck. Apparently Samsung's built-in
media player can only play files it has indexed itself. If you try
to use it to play an arbitrary file, say, "Song_Sparrow.mp3", it
will say: unknown file type. No matter that the file ends in .mp3 ...
and no matter that I've called
intent.setDataAndType(Uri.parse(url), "audio/mpeg"); ...
and no matter that the file is sitting on the SD cad and has in fact
been indexed already by the media player. You didn't navigate to it
via the media player's UI, so it refuses to play it.
I haven't been able to come up with an answer to how to make Samsung's
media player more flexible, and I was just starting a search for
alternate Android MP3 player apps, when I ran across
Play
mp3 in SD Card, using Android's MediaPlayer
and Error
creating MediaPlayer with Uri or file in assets
which gave me the solution. Instead of using an intent and letting
WebView call up a music application, you can use an Android
MediaPlayer
to play your file directly.
Here's what the code looks like, inside setWebViewClient() which is
itself inside onCreate():
            @Override
            public boolean shouldOverrideUrlLoading(WebView view, String url) {
                if (url.endsWith(".mp3")) {
                    MediaPlayer mediaPlayer = new MediaPlayer();
                    try {
                        mediaPlayer.setDataSource(getApplicationContext(), Uri.parse(url));
                        mediaPlayer.prepare();
                        mediaPlayer.start();
                    }
                    catch (IllegalArgumentException e) { showMessage("Illegal argument exception on " + url); }
                    catch (IllegalStateException e) { showMessage("Illegal State exception on " + url); }
                    catch (IOException e) { showMessage("I/O exception on " + url); }
                }
            }
showMessage() is my little wrapper that pops up an error message dialog.
Of course, you can handle other types, not just files ending in .mp3.
And now I can take the Galaxy out on a birdwalk and use it to help me
identify bird songs.
Tags: android, programming, nature, birds
[
14:28 May 06, 2012
More programming |
permalink to this entry |
]
Wed, 02 May 2012
I bought a Miata yesterday! My new baby. It's a 2000, in a lovely
color Mazda calls "twilight blue mica".
(You can see Miata
pictures here, if you're so inclined.)
I'd forgotten how much nicer sports cars are to drive. I retired my
last X1/9 more than a year ago, and have been driving mushy street
vehicles since then. The Miata surprises me every time I get into
it with its immediacy -- throttle, brake, steering, everything
happens now.
It does have some used-car glitches that I need to sort out
(some of them maybe even severe), but in general
it's a great car: in stock trim it handles a
lot like the street-prepared X1/9, even on crappy Kumho tires.
Of course, that could be new owner infatuation talking. Ask me
again in a few months. :-)
![[extremely strange seatbelt warning]](http://shallowsky.com/images/cars/miata/seatbelt-warning.jpg) But really what I wanted to write about was the extremely strange
warning sticker that came plastered to the driver's side window.
I didn't really look at the sticker until the second day after I
drove the car home, and then did a double-take. It says:
But really what I wanted to write about was the extremely strange
warning sticker that came plastered to the driver's side window.
I didn't really look at the sticker until the second day after I
drove the car home, and then did a double-take. It says:
While use of all seat belts reduce the chance of ejection,
failure to install and use shoulder harnesses with lap
belts can result in serious or fatal injuries in some crashes.
Lap-only belts increase the chance of head and neck injury by
allowing the upper torso to move unrestrained in a crash and increase
the chance of spinal column and abdominal injuries by concentrating
excessive force on the lower torso. Because children carry a
disproportionate amount of body weight above the waist, they are more
likely to sustain those injuries. Shoulder harnesses may be
available that can be retrofitted in this vehicle. For more
information call the Auto Safety Hotline at 1-800-424-9393.
If you look at the photo I took of the sticker, note the
shoulder belt anchor at the right edge of the frame.
It's a normal stock shoulder belt, just like you'll find
in any car -- this is a 2000 model, for crying out loud, not a 1970.
A web search on the error message led me to
Section 27314.5
of the California Vehicle Code, which states that
27314.5. (a) (1) Subject to paragraph (3), no dealer shall sell or
offer for sale any used passenger vehicle of a model year of 1972 to
1990, inclusive, unless there is affixed to the window of the left
front door or, if there is no window, to another suitable location so
that it may be seen and read by a person standing outside the vehicle
at that location, a notice, printed in 14-point type, which reads as follows:
... followed by the text on my sticker. It goes on:
(2) The notice shall remain affixed to the vehicle pursuant to
paragraph (1) at all times that the vehicle is for sale.
So the dealer must have put this sticker on. But why? Reading on:
(3) The notice is not required to be affixed to any vehicle equipped
with both a lap belt and a shoulder harness for the driver and one
passenger in the front seat of the vehicle and for at least two
passengers in the rear seat of the vehicle.
The dealer must not have read as far as paragraph (3).
I also found that, despite the fact that the DMV's website still links to
the page I linked above,
that statute was in the
process of being repealed by CA Assembly Bill 2679. Except that if you
click on "Read latest draft", apparently they changed their minds
again in the latest
version of AB 2679 and are now going to keep the warning in.
Maybe instead of leaving it unchanged or striking it, they should
change it to make it clearer that it only applies to cars without
shoulder harnesses installed ... if there are any such cars.
Haven't shoulder harnesses been mandatory in US cars since the early
1970s? Wikipedia
says they've been mandatory in the front seat since 1968 ... but the
citation they give for that goes to a page that no longer exists,
so that may be off by a few years.
In any case, anyone buying a car so old it doesn't have a shoulder
harness and only "may" be able to have one retrofitted to it
probably understands there may be some safety issues in a 40-year-old
car, and doesn't need a warning sticker.
Tags: cars, miata, warning, humor
[
21:05 May 02, 2012
More misc |
permalink to this entry |
]
![[early stage of annular eclipse 2012, showing sunspots]](http://shallowsky.com/images/annular-eclipse-2012/img_5402.jpg)
![[black drop at end of annularity]](http://shallowsky.com/images/annular-eclipse-2012/img_5412.jpg)
![[pinhole eclipse viewing]](http://shallowsky.com/images/annular-eclipse-2012/img_5287.jpg)
![[binocular projection for eclipse]](http://shallowsky.com/images/annular-eclipse-2012//img_5283.jpg)
![[Solar annular eclipse of January 15, 2010 in Jinan, Republic of China, by A013231 on Wikimedia Commons.]](http://commons.wikimedia.org/wiki/File:Solar_annular_eclipse_of_January_15,_2010_in_Jinan,Republic_of_China.JPG)
![[eclipse viewed through leaves]](http://commons.wikimedia.org/wiki/File:IMG_1650_zonsverduistering_Malta.JPG)
![[Solar projection with a Dobsonian]](http://commons.wikimedia.org/wiki/File:Home_made_dobsonian_user_to_make_a_solar_projection_%28Split,_Croatia%29_3.jpg)