Shallow Thoughts : tags : eclipse
Akkana's Musings on Open Source Computing and Technology, Science, and Nature.
Sat, 13 Apr 2024
![[Viewing the eclipse from 19 Mile Crossing, TX]](https://shallowsky.com/blog/images/eclipse2024/PXL_20240408_174051739.jpg) I'm sorry, but I have no eclipse photos to share. I messed that up.
But I did get to see totality.
I'm sorry, but I have no eclipse photos to share. I messed that up.
But I did get to see totality.
For the April 8, 2024 eclipse, Dave and I committed early to Texas.
Seemed like that was where the best long-range forecasts were.
In the last week before the eclipse, the forecasts were no longer
looking so good. But I've heard so many stories of people driving around
trying to chase holes in the clouds, only to be skunked,
while people who stayed put got a better view.
We decided to stick with our plan, which was to stay in San Angelo
(some 190 miles off the centerline) the night before,
get up fairly early and drive to somewhere near the centerline.
Read more ...
Tags: eclipse, astronomy, photography
[
12:36 Apr 13, 2024
More science/astro |
permalink to this entry |
]
Sat, 14 Oct 2023
![[Annular eclipse, afocal with cellphone camera through H-alpha scope]](https://shallowsky.com/blog/images/annular-eclipse-2023/PXL_20231014_163643277T.jpg) The path for the Oct 14, 2023 annular eclipse passed right over my house.
What luck!
The path for the Oct 14, 2023 annular eclipse passed right over my house.
What luck!
We'd driven a few hours to see the
last annular eclipse,
in 2012, from Red Bluff, CA.
The opportunity to see one from home, without needing to drive anywhere,
was not to be missed.
Read more ...
Tags: eclipse, astronomy
[
19:22 Oct 14, 2023
More science/astro |
permalink to this entry |
]
Sun, 27 Aug 2017
![[2017 Solar eclipse with corona]](http://shallowsky.com/images/eclipse2017/img_1505.jpg) My first total eclipse! The suspense had been building for years.
My first total eclipse! The suspense had been building for years.
Dave and I were in Wyoming. We'd made a hotel reservation nine months
ago, by which time we were already too late to book a room in the zone
of totality and settled for Laramie, a few hours' drive from the centerline.
For visual observing, I had my little portable 80mm refractor. But
photography was more complicated. I'd promised myself that for my
first (and possibly only) total eclipse, I wasn't going to miss the
experience because I was spending too much time fiddling with cameras.
But I couldn't talk myself into not trying any photography at all.
Initially, my plan was to use my
90mm Mak
as a 500mm camera lens. It had worked okay for the
the 2012 Venus transit.
![[Homemade solar finder for telescope]](http://shallowsky.com/blog/images/solar-finder/img_1448.jpg) I spent several weeks before the eclipse in a flurry of creation,
making a couple of
solar finders,
a barn-door
mount, and then wrestling with motorizing the barn-door (which was
a failure because I couldn't find a place to buy decent gears for the motor.
I'm still working on that and will eventually write it up).
I wrote up a plan: what equipment I would use when, a series of
progressive exposures for totality, and so forth.
I spent several weeks before the eclipse in a flurry of creation,
making a couple of
solar finders,
a barn-door
mount, and then wrestling with motorizing the barn-door (which was
a failure because I couldn't find a place to buy decent gears for the motor.
I'm still working on that and will eventually write it up).
I wrote up a plan: what equipment I would use when, a series of
progressive exposures for totality, and so forth.
And then, a couple of days before we were due to leave, I figured I
should test my rig -- and discovered that it was basically impossible
to focus on the sun. For the Venus transit, the sun wasn't that high
in the sky, so I focused through the viewfinder. But for the total
eclipse, the sun would be almost overhead, and the viewfinder nearly
impossible to see. So I had planned to point the Mak at a distant
hillside, focus it, then slip the filter on and point it up to the sun.
It turned out the focal point was completely different through the filter.
![[Solar finder for DSLR, made from popsicle sticks]](http://shallowsky.com/images/eclipse2017/img_7792T.jpg) With only a couple of days left to go, I revised my plan.
The Mak is difficult to focus under any circumstances. I decided
not to use it, and to stick to my Canon 55-250mm zoom telephoto,
with the camera on a normal tripod. I'd skip the partial eclipse
(I've photographed those before anyway) and concentrate on
getting a few shots of the diamond ring and the corona, running
through a range of exposures without needing to look at the camera
screen or do any refocusing. And since I wasn't going to be usinga
telescope, my nifty solar finders wouldn't work; I designed a new
one out of popsicle sticks to fit in the camera's hot shoe.
With only a couple of days left to go, I revised my plan.
The Mak is difficult to focus under any circumstances. I decided
not to use it, and to stick to my Canon 55-250mm zoom telephoto,
with the camera on a normal tripod. I'd skip the partial eclipse
(I've photographed those before anyway) and concentrate on
getting a few shots of the diamond ring and the corona, running
through a range of exposures without needing to look at the camera
screen or do any refocusing. And since I wasn't going to be usinga
telescope, my nifty solar finders wouldn't work; I designed a new
one out of popsicle sticks to fit in the camera's hot shoe.
Getting there
We stayed with relatives in Colorado Saturday night, then drove to
Laramie Sunday. I'd heard horror stories of hotels canceling people's
longstanding eclipse reservations, but fortunately our hotel honored
our reservation. WHEW! Monday morning, we left the hotel at 6am in
case we hit terrible traffic. There was already plenty of traffic on
the highway north to Casper, but we turned east hoping for fewer crowds.
A roadsign sign said "NO PARKING ON HIGHWAY." They'd better not try
to enforce that in the totality zone!
![[Our eclipse viewing pullout on Wyoming 270]](http://shallowsky.com/images/eclipse2017/img_7726T.jpg) When we got to I-25 it was moving and, oddly enough, not particularly
crowded. Glendo Reservoir had looked on the map like a nice spot on
the centerline ... but it was also a state park, so there was a risk
that everyone else would want to go there. Sure enough: although
traffic was moving on I-25 at Wheatland, a few miles north the freeway
came to a screeching halt. We backtracked and headed east toward Guernsey,
where several highways went north toward the centerline.
When we got to I-25 it was moving and, oddly enough, not particularly
crowded. Glendo Reservoir had looked on the map like a nice spot on
the centerline ... but it was also a state park, so there was a risk
that everyone else would want to go there. Sure enough: although
traffic was moving on I-25 at Wheatland, a few miles north the freeway
came to a screeching halt. We backtracked and headed east toward Guernsey,
where several highways went north toward the centerline.
East of Glendo, there were crowds at every highway pullout and rest
stop. As we turned onto 270 and started north, I kept an eye on
OsmAnd on my phone, where I'd loaded
a GPX file of the eclipse path. When we were within a mile of the
centerline, we stopped at a likely looking pullout. It was maybe 9 am.
A cool wind was blowing -- very pleasant since we were expecting a hot
day -- and we got acquainted with our fellow eclipse watchers as we
waited for first contact.
Our pullout was also the beginning of a driveway to a farmhouse we could
see in the distance. Periodically people pulled up, looking lost,
checked maps or GPS, then headed down the road to the farm. Apparently
the owners had advertised it as an eclipse spot -- pay $35, and you
can see the eclipse and have access to a restroom too! But apparently
the old farmhouse's plumbing failed early on, and some of the people
who'd paid came out to the road to watch with us since we had better
equipment set up.
![[Terrible afocal view of partial eclipse]](http://shallowsky.com/images/eclipse2017/img_1491T.jpg) There's not much to say about the partial eclipse. We all traded views
-- there were five or six scopes at our pullout, including a nice
little H-alpha scope. I snapped an occasional photo through the 80mm
with my pocket camera held to the eyepiece, or with the DSLR through
an eyepiece projection adapter. Oddly, the DSLR photos came out worse
than the pocket cam ones. I guess I should try and debug that at some point.
There's not much to say about the partial eclipse. We all traded views
-- there were five or six scopes at our pullout, including a nice
little H-alpha scope. I snapped an occasional photo through the 80mm
with my pocket camera held to the eyepiece, or with the DSLR through
an eyepiece projection adapter. Oddly, the DSLR photos came out worse
than the pocket cam ones. I guess I should try and debug that at some point.
Shortly before totality, I set up the DSLR on the tripod, focused on a
distant hillside and taped the focus with duct tape, plugged in the
shutter remote, checked the settings in Manual mode, then set the
camera to Program mode and AEB (auto exposure bracketing). I put the
lens cap back on and pointed the camera toward the sun using the
popsicle-stick solar finder. I also set a countdown timer, so I could
press START when totality began and it would beep to warn me when it was
time to the sun to come back out. It was getting chilly by then, with
the sun down to a sliver, and we put on sweaters.
The pair of eclipse veterans at our pullout had told everybody to
watch for the moon's shadow racing toward us across the hills from the
west. But I didn't see the racing shadow, nor any shadow bands.
And then Venus and Mercury appeared and the sun went away.
Totality
![[Solar eclipse diamond ring]](http://shallowsky.com/images/eclipse2017/img_1499c.jpg) One thing the photos don't prepare you for is the color of the sky. I
expected it would look like twilight, maybe a little darker; but it
was an eerie, beautiful medium slate blue. With that unworldly
solar corona in the middle of it, and Venus gleaming as bright as
you've ever seen it, and Mercury shining bright on the other side.
There weren't many stars.
One thing the photos don't prepare you for is the color of the sky. I
expected it would look like twilight, maybe a little darker; but it
was an eerie, beautiful medium slate blue. With that unworldly
solar corona in the middle of it, and Venus gleaming as bright as
you've ever seen it, and Mercury shining bright on the other side.
There weren't many stars.
We didn't see birds doing anything unusual; as far as I can tell,
there are no birds in this part of Wyoming. But the cows did all
get in a line and start walking somewhere. Or so Dave tells me.
I wasn't looking at the cows.
Amazingly, I remembered to start my timer and to pull off the DSLR's
lens cap as I pushed the shutter button for the diamond-ring shots
without taking my eyes off the spectacle high above. I turned the
camera off and back on (to cancel AEB), switched to M mode, and
snapped a photo while I scuttled over to the telescope, pulled the
filter off and took a look at the corona in the wide-field eyepiece.
So beautiful! Binoculars, telescope, naked eye -- I don't know which
view was best.
I went through my exposure sequence on the camera, turning the dial a
couple of clicks each time without looking at the settings, keeping my
eyes on the sky or the telescope eyepiece. But at some point I happened
to glance at the viewfinder -- and discovered that the sun was drifting
out of the frame. Adjusting the tripod to get it back in the frame
took longer than I wanted, but I got it there and got my eyes
back on the sun as I snapped another photo ...
and my timer beeped.
I must have set it wrong! It couldn't possibly have been two
and a half minutes. It had been 30, 45 seconds tops.
But I nudged the telescope away from the sun, and looked back up -- to
another diamond ring. Totality really was ending and it was time to
stop looking.
Getting Out
The trip back to Golden, where we were staying with a relative, was
hellish. We packed up immediately after totality -- we figured we'd
seen partials before, and maybe everybody else would stay. No such luck.
By the time we got all the equipment packed there was already a steady
stream of cars heading south on 270.
A few miles north of Guernsey the traffic came to a stop. This was to
be the theme of the afternoon. Every small town in Wyoming has a stop sign
or signal, and that caused backups for miles in both directions.
We headed east, away from Denver, to take rural roads down through
eastern Wyoming and Colorado rather than I-25, but even so,
we hit small-town stop sign backups every five or ten miles.
We'd brought the Rav4 partly for this reason. I kept my eyes glued on
OsmAnd and we took dirt roads when we could, skirting the paved
highways -- but mostly there weren't any dirt roads going where we
needed to go. It took about 7 hours to get back to Golden, about twice
as long as it should have taken. And we should probably count
ourselves lucky -- I've heard from other people who took 11 hours to
get to Denver via other routes.
Lessons Learned
Dave is fond of the quote,
"No battle plan survives contact with the enemy"
(which turns out to be from Prussian military strategist
Helmuth
von Moltke the Elder).
The enemy, in this case, isn't the eclipse; it's time.
Two and a half minutes sounds like a lot, but it goes by like nothing.
Even in my drastically scaled-down plan, I had intended exposures from
1/2000 to 2 seconds (at f/5.6 and ISO 400). In practice, I only made
it to 1/320 because of fiddling with the tripod.
And that's okay. I'm thrilled with the photos I got, and definitely
wouldn't have traded any eyeball time for more photos. I'm more annoyed
that the tripod fiddling time made me miss a little bit of extra looking.
My script actually worked out better than I expected, and I was very
glad I'd done the preparation I had. The script was reasonable, the
solar finders worked really well, and the lens was even in focus
for the totality shots.
Then there's the eclipse itself.
I've read so many articles about solar eclipses as a mystical,
religious experience. It wasn't, for me. It was just an eerily
beautiful, other-worldly spectacle: that ring of cold fire staring
down from the slate blue sky, bright planets but no stars, everything
strange, like nothing I'd ever seen. Photos don't get across what it's
like to be standing there under that weird thing in the sky.
I'm not going to drop everything to become a globe-trotting eclipse
chaser ... but I sure hope I get to see another one some day.
Photos: 2017
August 21 Total Solar Eclipse in Wyoming.
Tags: eclipse, astronomy, photography
[
20:41 Aug 27, 2017
More science/astro |
permalink to this entry |
]
Mon, 14 Aug 2017
While I was testing various attempts at motorizing my barn-door mount,
trying to get it to track the sun, I had to repeatedly find the sun
in my telescope.
In the past, I've generally used the shadow of the telescope combined
with the shadow of the finderscope. That works, more or less, but it's
not ideal: it doesn't work as well with just a telescope with no finder,
which includes both of the scopes I'm planning to take to the eclipse;
and it requires fairly level ground under the telescope: it doesn't
work if there are bushes or benches in the way of the shadow.
For the eclipse, I don't want to waste any time finding the sun:
I want everything as efficient as possible. I decided to make a little
solar finderscope. One complication, though: since I don't do solar
observing very often, I didn't want to use tape, glue or, worse, drill
holes to mount it.
So I wanted something that could be pressed against the telescope and
held there with straps or rubber bands, coming off again without
leaving a mark. A length of an angled metal from my scrap pile
seemed like a good size to be able to align itself against a small
telescope tube.
![[Constructing a solar sight]](http://shallowsky.com/blog/images/solar-finder/img_1444sm.jpg) Then I needed front and rear sights. For the front sight, I wanted a
little circle that could project a bulls-eye shadow onto a paper card
attached to the rear sight. I looked at the hardware store for small
eye-bolts, but no dice. Apparently they don't come that small.I
settled for the second-smallest size of screw eye.
Then I needed front and rear sights. For the front sight, I wanted a
little circle that could project a bulls-eye shadow onto a paper card
attached to the rear sight. I looked at the hardware store for small
eye-bolts, but no dice. Apparently they don't come that small.I
settled for the second-smallest size of screw eye.
The screw eye, alas, is meant to screw into wood, not metal. So I
cut a short strip of wood a reasonable size to nestle into the inside
of the angle-iron. (That ripsaw Dave bought last year sure does come
in handy sometimes.) I drilled some appropriately sized holes and
fastened screw eyes on both ends, adding a couple of rubber grommets
as spacers because the screw eyes were a little too long and I didn't
want the pointy ends of the screws getting near my telescope tube.
I added some masking tape on the sides of the angle iron so it wouldn't
rub off the paint on the telescope tube, then bolted a piece of
cardboard cut from an old business card to the rear screw eye.
Voila! A rubber-band-attached solar sight that took about an hour to make.
Notice how the shadow of the front sight exactly fits around the rear
sight: you line up the shadow with the rear sight to point the scope.
It seems to work pretty well, and it should be adaptable to any
telescope I use.
I used a wing nut to attach the rear cardboard: that makes it easy to
replace it or remove it. With the cardboard removed,
the sight might even work for night-time astronomy viewing. That is,
it does work, as long as there's enough ambient light to see the rings.
Hmm... maybe I should paint the rings with glow-in-the-dark paint.
Update: I have an even simpler design that works perfectly on a camera
with a hot shoe, and almost as well on a telescope, pictured here:
Camera solar finder made from popsicle sticks.
Tags: astronomy, eclipse
[
15:25 Aug 14, 2017
More science/astro |
permalink to this entry |
]
Thu, 10 Aug 2017
![[Curved rod barn-door mount]](http://shallowsky.com/blog/images/barndoor/img_1410sm.jpg) I've been meaning forever to try making a "barn door" tracking mount.
Used mainly for long-exposure wide-field astrophotography, the barn door
mount, invented in 1975, is basically two pieces of wood with a hinge.
The bottom board mounts on a tripod and is pointed toward the North Star;
"opening" the hinge causes the top board to follow the motion of the
sky, like an equatorial telescope mount. A threaded rod and a nut
control the angle of the "door", and you turn the nut manually every
so often. Of course, you can also drive it with a motor.
I've been meaning forever to try making a "barn door" tracking mount.
Used mainly for long-exposure wide-field astrophotography, the barn door
mount, invented in 1975, is basically two pieces of wood with a hinge.
The bottom board mounts on a tripod and is pointed toward the North Star;
"opening" the hinge causes the top board to follow the motion of the
sky, like an equatorial telescope mount. A threaded rod and a nut
control the angle of the "door", and you turn the nut manually every
so often. Of course, you can also drive it with a motor.
We're off to view the eclipse in a couple of weeks.
Since it's my first total eclipse, my plan is to de-emphasize
photography: especially during totality, I want to experience the
eclipse, not miss it because my eyes are glued to cameras and timers
and other equipment. But I still want to take photos every so often.
Constantly adjusting a tripod to keep the sun in frame is another
hassle that might keep my attention away from the eclipse. But real
equatorial mounts are heavy and a time consuming to set up;
since I don't know how crowded the area will be, I wasn't
planning to take one. Maybe a barn door would solve that problem.
Perhaps more useful, it would mean that my sun photos would all be
rotated approximately the right amount, in case I wanted to make an
animation. I've taken photos of lunar and partial solar eclipses, but
stringing them together into an animation turned out to be too much
hassle because of the need to rotate and position each image.
I've known about barn-door mounts since I was a kid, and I knew the
basic theory, but I'd never paid much attention to the details. When I
searched the web, it sounded complicated -- it turned out there are
many types that require completely different construction techniques.
The best place to start (I found out after wasting a lot of time on
other sites) is the
Wikipedia
article on "Barn door tracker", which gives a wonderfully clear
overview, with photos, of the various types. I had originally been
planning a simple tangent or isosceles type; but when I read
construction articles, it seemed that those seemingly simple types
might not be so simple to build: the angle between the threaded rod
and the boards is always changing, so you need some kind of a pivot.
Designing the pivot looked tricky. Meanwhile, the pages I found on
curved-rod mounts all insisted that bending the rod was easy, no
trouble at all. I decided to try a curved-rod mount first.
The canonical reference is a 2015 article by Gary Seronik:
A
Tracking Platform for Astrophotography. But I found three other good
construction guides:
Optical Ed's
"Making a Curve Bolt Barn Door",
a
Cloudy Nights discussion thread "Motorized Barn Door Mount Kit",
and
Massapoag
Pond Photography's "Barn Door Tracker".
I'm not going to reprise all their construction details, so refer to
those sites if you try making your own mount.
![[Barn-door mount, showing piano hinge]](http://shallowsky.com/blog/images/barndoor/img_1405sm.jpg) The crucial parts are a "piano hinge", a long hinge that eliminates
the need to line up two or more hinges, and the threaded rod.
Buying a piano hinge in the right size proved impossible locally,
but the folks at Metzger's assured me that piano hinges can be cut,
so I bought one longer than I needed and cut it to size.
I used a 1/4-20 rod, which meant (per the discussions in the Cloudy
Nights discussion linked above) that a 11.43-inch radius from the
hinge to the holes the rod passes through would call for the nut to
turn at a nice round number of 1 RPM.
The crucial parts are a "piano hinge", a long hinge that eliminates
the need to line up two or more hinges, and the threaded rod.
Buying a piano hinge in the right size proved impossible locally,
but the folks at Metzger's assured me that piano hinges can be cut,
so I bought one longer than I needed and cut it to size.
I used a 1/4-20 rod, which meant (per the discussions in the Cloudy
Nights discussion linked above) that a 11.43-inch radius from the
hinge to the holes the rod passes through would call for the nut to
turn at a nice round number of 1 RPM.
I was suspicious of the whole "it's easy to bend the threaded rod ina
11.43-inch circle" theory, but it turned out to be true. Draw the
circle you want on a sheet of newspaper, put on some heavy gloves
and start bending, frequently comparing your rod to the circle you drew.
You can fine-tune the curvature later.
I cut my boards, attached the hinge, measured about 11.4" and drilled
a hole for the threaded rod. The hole needed to be a bit bigger than
5/8" to let the curved rod pass through without rubbing. Attach the
curved rod to the top wood piece with a couple of nuts and some
washers, and then you can fine-tune the rod's curvature, opening and
closing the hinge and re-bending the rod a little in any place it rubs.
A 5/8" captive nut on the top piece lets you attach a tripod head
which will hold your camera or telescope. A 1/4" captive nut on the
bottom piece serves to attach the mount to a tripod -- you need a
1/4", not 3/8": the rig needs to mount on a tripod head, not just the
legs, so you can align the hinge to the North Star. (Of course, you
could build a wedge or your own set of legs, if you prefer.) The 3/4"
plywood I was using turned out to be thicker than the captive nuts, so
I had to sand the wood thinner in both places. Maybe using half-inch
plywood would have been better.
![[Wing nut on barn-door mount]](http://shallowsky.com/blog/images/barndoor/img_1407.jpg) The final piece is the knob/nut you'll turn to make the mount track.
I couldn't find a good 1/4" knob for under $15.
A lot of people make a wood circle and mount the nut in
the center, or use a gear so a motor can drive the mount. I looked
around at things like jam-jar lids and the pile of metal gears and
sprinkler handles in my welding junkpile, but I didn't see anything
that looked quite right, so I decided to try a wing nut just for
testing, and worry about the knob later. Turns out a wing nut works
wonderfully; there's no particular need for anything else if you're
driving your barn-door manually.
The final piece is the knob/nut you'll turn to make the mount track.
I couldn't find a good 1/4" knob for under $15.
A lot of people make a wood circle and mount the nut in
the center, or use a gear so a motor can drive the mount. I looked
around at things like jam-jar lids and the pile of metal gears and
sprinkler handles in my welding junkpile, but I didn't see anything
that looked quite right, so I decided to try a wing nut just for
testing, and worry about the knob later. Turns out a wing nut works
wonderfully; there's no particular need for anything else if you're
driving your barn-door manually.
Testing time! I can't see Polaris from my deck, and I was too lazy to
set up anywhere else, so I used a protractor to set the hinge angle to
roughly 36° (my latitude), then pointed it approximately north.
I screwed my Pro-Optic 90mm Maksutov (the scope I plan to use for
my eclipse photos) onto the ball head and pointed it at the moon
as soon as it rose. With a low power eyepiece (20x), turning the wing
nut kept the moon more or less centered in the field for the next
half-hour, until clouds covered the moon and rain began threatening.
I didn't keep track of how many turns I was making, since I knew the
weather wasn't going to allow a long session, and right now I'm not
targeting long-exposure photography, just an easy way of keeping an
object in view.
A good initial test! My web searches, and the discovery of all
those different types of barn-door mounts and pivots and flex
couplings and other scary terms, had seemed initially daunting.
But in the end, building a barn-door mount was just as easy as
people say it is, and I finished it in a day.
And what about a motor? I added one a few days later, with a stepper
and an Arduino. But that's a separate article.
Tags: astronomy, hardware, eclipse
[
19:25 Aug 10, 2017
More science/astro |
permalink to this entry |
]
Thu, 01 Oct 2015
![[Eclipsed moon rising]](http://shallowsky.com/lunareclipse/moonrise-frames/moonrise-eclipse-img_9476T.jpg) The lunar eclipse on Sunday was gorgeous. The moon rose already in
eclipse, and was high in the sky by the time totality turned the
moon a nice satisfying deep red.
The lunar eclipse on Sunday was gorgeous. The moon rose already in
eclipse, and was high in the sky by the time totality turned the
moon a nice satisfying deep red.
I took my usual slipshod approach to astrophotography. I had my 90mm
f/5.6 Maksutov lens set up on the patio with the camera attached,
and I made a shot whenever it seemed like things had changed
significantly, adjusting the exposure if the review image looked
like it might be under- or overexposed, occasionally attempting
to refocus. The rest of the time I spent socializing with friends,
trading views through other telescopes and binoculars, and enjoying an
apple tart a la mode.
So the images I ended up with aren't all they could be --
not as sharply focused as I'd like (I never have figured out a
good way of focusing the Rebel on astronomy images) and rather
grainy.
Still, I took enough images to be able to put together a couple of
animations: one of the lovely moonrise over the mountains, and one
of the sequence of the eclipse through totality.
Since the 90mm Mak was on a fixed tripod, the moon drifted through the
field and I had to adjust it periodically as it drifted out.
So the main trick to making animations was aligning all the moon
images. I haven't found an automated way of doing that, alas,
but I did come up with some useful GIMP techniques, which I'm in
the process of writing up as a tutorial.
Once I got the images all aligned as layers in a GIMP image,
I saved them as an animated GIF -- and immediately discovered that
the color error you get when converting to an indexed GIF image
loses all the beauty of those red colors. Ick!
So instead, I wrote a little Javascript animation function that
loads images one by one at fixed intervals. That worked a lot better
than the GIF animation, plus it lets me add a Start/Stop button.
You can view the animations (or the source for the javascript
animation function) here:
Lunar eclipse animations
Tags: astronomy, eclipse, moon, gimp
[
12:55 Oct 01, 2015
More science/astro |
permalink to this entry |
]
Fri, 24 Oct 2014
![[Partial solar eclipse, with sunspots]](http://shallowsky.com/blog/images/img_1346cT.jpg) We had perfect weather for the partial solar eclipse yesterday.
I invited some friends over for an eclipse party -- we set up
a couple of scopes with solar filters, put out food and drink
and had an enjoyable afternoon.
We had perfect weather for the partial solar eclipse yesterday.
I invited some friends over for an eclipse party -- we set up
a couple of scopes with solar filters, put out food and drink
and had an enjoyable afternoon.
And what views! The sunspot group right on the center of the sun's disk
was the most large and complex I'd ever seen, and there were some much
smaller, more subtle spots in the path of the eclipse. Meanwhile, the
moon's limb gave us a nice show of mountains and crater rims silhouetted
against the sun.
I didn't do much photography, but I did hold the point-and-shoot up to
the eyepiece for a few shots about twenty minutes before maximum eclipse,
and was quite pleased with the result.
An excellent afternoon. And I made too much blueberry bread and
far too many oatmeal cookies ... so I'll have sweet eclipse memories
for quite some time.
Tags: eclipse, astronomy, science
[
09:15 Oct 24, 2014
More science/astro |
permalink to this entry |
]
Tue, 22 May 2012
![[Annular eclipse 2012]](http://shallowsky.com/images/annular-eclipse-2012/img_5308T.jpg) I've just seen the annular eclipse, and what a lovely sight it was!
I've just seen the annular eclipse, and what a lovely sight it was!
This was only my second significant solar eclipse, the first being a
partial when I was a teenager. So I was pretty excited about an
annular so nearby -- the centerline was only about a 4-hour drive from home.
We'd made arrangements to join the Shasta astronomy club's eclipse party
at Whiskeytown Lake, up in the Trinity Alps. Sounded like a lovely spot,
and we'd be able to trade views with the members of the local astronomy
club as well as showing off the eclipse to the public. As astronomers
bringing telescopes, we'd get reserved parking and didn't even have to
pay the park fee. Sounded good!
Not knowing whether we might hit traffic, we left home first thing in
the morning, hours earlier than we figured was really necessary.
A good thing, as it turned out.
Not because we hit any traffic -- but because when we got to the site,
it was a zoo. There were cars idling everywhere, milling up and
down every road looking for parking spots.
We waited in the queue at the formal site, and finally got to the
front of the line, where we told the ranger we were bringing
telescopes for the event. He said well, um, we could drive in and
unload, but there was no parking so we'd just have to drive out
after unloading, hope to find a parking spot on the road somewhere,
and walk back.
What a fiasco!
After taking a long look at the constant stream of cars inching along in
both directions and the chaotic crowd at the site, we decided the
better part of valor was to leave this vale of tears and high-tail it
back to our motel in Red Bluff, only little farther south of the
centerline and still well within the path of annularity. Fortunately
we'd left plenty of extra time, so we made it back with time to spare.
The Annular Eclipse itself
![[early stage of annular eclipse 2012, showing sunspots]](http://shallowsky.com/images/annular-eclipse-2012/img_5402T.jpg) One striking thing about watching the eclipse through a telescope was
how fast the moon moves. The sun was well decorated with several excellent
large sunspot groups, so we were able to watch the moon swallow them
bit by bit.
One striking thing about watching the eclipse through a telescope was
how fast the moon moves. The sun was well decorated with several excellent
large sunspot groups, so we were able to watch the moon swallow them
bit by bit.
Some of the darker sunspot umbras even showed something like a
black drop effect
as they disappeared behind the moon. We couldn't see the same
effect on the smaller sunspot groups, or on the penumbras.
![[black drop at end of annularity]](http://shallowsky.com/images/annular-eclipse-2012/img_5412T.jpg) There was also a pronounced black drop effect at the onset and end
of annularity.
There was also a pronounced black drop effect at the onset and end
of annularity.
The seeing was surprisingly good, as solar observing goes. Not only
could we see good detail on the sunspot groups and solar faculae,
but we could easily see irregularities in the shape of the moon's
surface -- in particular one small sharp mountain peak on the leading edge,
and what looked like a raised crater wall farther south on that
leading edge. We never did get a satisfactory identification on
either feature.
![[pinhole eclipse viewing]](http://shallowsky.com/images/annular-eclipse-2012/img_5287T.jpg) After writing and speaking about eclipse viewing, I felt honor bound
to try viewing with pinholes of several sizes. I found that during early
stages of the eclipse, the pinholes had to be both small (under about
5 mm) and fairly round to show much. Later in the eclipse,
nearly anything worked to show the crescent or the annular ring,
including interlaced fingers or the shadow of a pine tree on the wall.
I wish I'd remembered to take an actual hole punch, which would have
been just about perfect.
After writing and speaking about eclipse viewing, I felt honor bound
to try viewing with pinholes of several sizes. I found that during early
stages of the eclipse, the pinholes had to be both small (under about
5 mm) and fairly round to show much. Later in the eclipse,
nearly anything worked to show the crescent or the annular ring,
including interlaced fingers or the shadow of a pine tree on the wall.
I wish I'd remembered to take an actual hole punch, which would have
been just about perfect.
![[binocular projection for eclipse]](http://shallowsky.com/images/annular-eclipse-2012//img_5283T.jpg) I also tried projection through binoculars, and convinced myself that
it would probably work as a means of viewing next month's Venus
transit -- but only with the binoculars on a tripod. Hand-holding
them is fiddly and difficult. (Of course, never look through
binoculars at the sun without a solar filter.) Look for an upcoming
article with more details on binocular projection.
I also tried projection through binoculars, and convinced myself that
it would probably work as a means of viewing next month's Venus
transit -- but only with the binoculars on a tripod. Hand-holding
them is fiddly and difficult. (Of course, never look through
binoculars at the sun without a solar filter.) Look for an upcoming
article with more details on binocular projection.
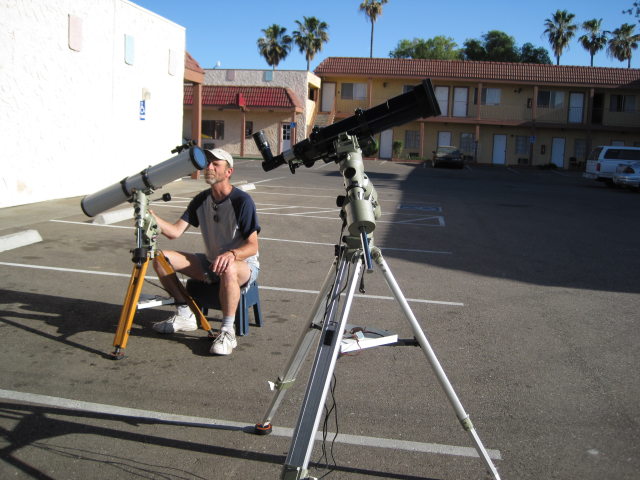
The cast of characters
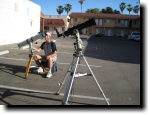 For us, the motel parking lot worked out great. We were staying at the
Crystal Motel in Red Bluff, an unassuming little motel that proved to be
clean and quiet, with friendly, helpful staff and the fastest motel
wi-fi connection I've ever seen. Maybe not the most scenic of
locations, but that was balanced by the convenience of having the car
and room so close by.
For us, the motel parking lot worked out great. We were staying at the
Crystal Motel in Red Bluff, an unassuming little motel that proved to be
clean and quiet, with friendly, helpful staff and the fastest motel
wi-fi connection I've ever seen. Maybe not the most scenic of
locations, but that was balanced by the convenience of having the car
and room so close by.
And we were able to show the eclipse to locals
and motel guests who wouldn't have been able to see it otherwise.
Many of these people, living right in the eclipse path, didn't even
know there was an eclipse happening, so poor had the media coverage been.
(That was true in the bay area too -- most people I talked to last week
didn't know there was an eclipse coming up, let alone how or where to
view it.)
We showed the eclipse to quite a cast of characters --
- The mother with medical problems, obviously feeling quite poorly
but still bringing her husband and son out for repeated views.
- the woman who said she didn't want to be in the sun because she'd
been drinking too much by the pool.
- The family where Dad kept looking through paper glasses the kids
insisted was a "3-D viewer". Alarmed, we took a look, and found it
was a perfectly reasonable eclipse viewer marked SAFE FOR SOLAR VIEWING.
Whew!
- The teen girl who kept looking directly at the sun despite everyone
telling her not to ... I hope she didn't damage her vision.
- The kid who wanted to borrow my binocular to look at some birds
circling in the distance. I wanted to let him, but with all the
attention on the sun I was too nervous, so instead I changed the
subject and showed him how to identify turkey vultures (wings in a V,
tipping from side to side) even without binoculars).
- The man who sat in a parking space near us reading a catalog,
telling us repeatedly he was just reading his catalog. When Dave
insisted he come and take a look, he looked in the eyepiece for about
ten seconds, then looked Dave in the eye and informed him solemnly
that he was just reading his catalog.
- The family who'd been instructed by their grandmother, in the hospital
awaiting an operation, to watch the eclipse and bring back pictures for her.
I hope they got some decent ones!
In between visitors, we had plenty of time to fiddle with equipment,
take photos, and take breaks sitting in the shade to cool down.
(Annularity was pleasantly cool, but the rest of the eclipse stayed
hot on an over 90 degree central valley day.)
There's a lot to be said for sidewalk astronomy! Overall, I'm glad
we ended up where we did rather than in that Whiskeytown chaos.
Here's my collection of
Images
from the "Ring of Fire" Annular Eclipse, May 2012, from Red Bluff, CA.
Tags: astronomy, science, eclipse, travel
[
11:42 May 22, 2012
More science/astro |
permalink to this entry |
]
Wed, 16 May 2012
![[Solar annular eclipse of January 15, 2010 in Jinan, Republic of China, by A013231 on Wikimedia Commons.]](http://shallowsky.com/blog/images/annular.JPG) This Sunday, May 20th, the western half of the US will be treated
to an annular solar eclipse.
This Sunday, May 20th, the western half of the US will be treated
to an annular solar eclipse.
Annular means that the moon is a bit farther away than usual, so it
won't completely cover the sun even if you travel to the eclipse
centerline. Why? Well, the moon's orbit around the earth
isn't perfectly circular, so sometimes it's farther away, sometimes
nearer. Remember all the hype two weeks ago about the "supermoon",
where it was unusually close at full moon? The other side of that
is that during this eclipse, at new moon, the moon is unusually far
away, and therefore a little smaller, not quite big enough to cover
the sun.
Since the sun will never be totally covered, make sure
you have a safe solar filter for this one -- don't look with your
naked eyes! You want a solar filter anyway, if you have any kind of
telescope or even binoculars, because of next month's once-in-a-lifetime
Venus transit (I'll write about that separately).
But if you don't have a solar filter and absolutely can't get one
in time, read on -- I'll have some suggestions later even for people
without any sort of optical aid.
But first, the path of the eclipse.
Here in the bay area, we're just a bit south of the southern limit of the
annular path, which passes just south of the town of Redway, through
Covelo, just south of Willows, then just misses Yuba City and
Auburn. If you want to be closer to the centerline, go camping at
Lassen National Park or Lake Shasta, or head to Reno or Tahoe
If you're inclined to travel, NASA has a great
interactive
2012 eclipse map you can use to check out possible locations.
Even back in the bay area, we still get a darn good dinner show. The partial
eclipse starts at 5:17 pm PDT, with maximum eclipse at 6:33. The sun
will be 18 degrees above the horizon at that point, and 89%
eclipsed. Compare that with 97% for a site right on the centerline --
remember, since this is an annular eclipse, no place sees 100%
coverage. The partial eclipse ends at 7:40 -- still well before
sunset, which isn't until 8:11.
Photographers, if you want a shot of an annular eclipse as the sun
sets, you'll need to head east, to Albuquerque, NM or Lubbock, TX.
A little before sunset, the centerline also crosses
near a lot of great vacation spots like Bryce, Zion and Canyon de Chelly.
![[eclipse viewed through leaves]](http://upload.wikimedia.org/wikipedia/commons/thumb/2/28/IMG_1650_zonsverduistering_Malta.JPG/320px-IMG_1650_zonsverduistering_Malta.JPG) I mentioned that even without a solar filter, there are ways of
watching the eclipse. The simplest is with a pinhole. You don't need
to use an actual pin -- the size and shape of the hole isn't critical,
as you can see in this
image
of the sun through the leaves of a tree during a 2005 eclipse in Malta.
If you don't have a leafy tree handy, you can even lace your fingers
together and look at the shadow of your hands. This eclipse will be
very low in the sky, continuing through sunset, so you may need to
project its shadow onto a wall rather than the ground.
I mentioned that even without a solar filter, there are ways of
watching the eclipse. The simplest is with a pinhole. You don't need
to use an actual pin -- the size and shape of the hole isn't critical,
as you can see in this
image
of the sun through the leaves of a tree during a 2005 eclipse in Malta.
If you don't have a leafy tree handy, you can even lace your fingers
together and look at the shadow of your hands. This eclipse will be
very low in the sky, continuing through sunset, so you may need to
project its shadow onto a wall rather than the ground.
If you have some
time to prepare, take a piece of cardboard and punch a few holes
through it. Try different sizes -- an actual pinhole, a BBQ skewer,
a 3-hole punch, maybe even bigger holes up to the size of a penny.
You might also try using aluminum foil -- you can get very clean
circular holes that way, which might give a crisper image.
Here's a good page on
eclipse
pinhole projection.
What works best? I don't remember! It's been a very long time since
the last eclipse here! Do the experiment! I know I will be.
![[Solar projection with a Dobsonian]](http://upload.wikimedia.org/wikipedia/commons/thumb/0/06/Home_made_dobsonian_user_to_make_a_solar_projection_%28Split%2C_Croatia%29_3.jpg/320px-Home_made_dobsonian_user_to_make_a_solar_projection_%28Split%2C_Croatia%29_3.jpg) If you do have a telescope or binoculars but couldn't get a solar
filter in time, don't despair. Instead of looking through the
eyepiece, you can project the sun's image onto a white screen or even
the ground or a wall. Use a cheap, low-power eyepiece -- any eyepiece
you use for solar projection will get very hot, and you don't want to
risk ruining a fancy one.
If you do have a telescope or binoculars but couldn't get a solar
filter in time, don't despair. Instead of looking through the
eyepiece, you can project the sun's image onto a white screen or even
the ground or a wall. Use a cheap, low-power eyepiece -- any eyepiece
you use for solar projection will get very hot, and you don't want to
risk ruining a fancy one.
Point the telescope at the sun -- it's easy to tell when it's
lined up by watching the shadow of the telescope -- and rotate the
eyepiece so that it's aimed at your screen, which can be as simple
as a sheet of paper. Be careful where that eyepiece is aimed -- make
sure no one can walk through the path or put their hand in the way,
and if you have a finderscope, make sure it's covered.
This solar projection method works with binoculars too, but you'll want
to mount them on a tripod so you don't have to hold them the whole time.
Of course, another great way to watch the eclipse is with your local
astronomy club. I expect every club in the bay area -- and there are a
lot of them -- will have telescopes out to share the eclipse with the
public. So check with your local club --
San Jose Astronomical Association,
Peninsula Astronomical Society,
San Francisco Sidewalk
Astronomers,
San Francisco Amateur Astronomers,
or any of the others on the AANC's list of
Amateur
Astronomy Clubs in Northern California
or the
SF
Chronicle's list of astronomy clubs.
This eclipse should be pretty cool -- and a great chance to test
out your solar equipment before next month's Venus transit.
When I went to put the event on my wall calendar last month, I discovered
the calendar already had an entry for May 20: it's the start of Bear
Awareness Week. So if you head up to Lassen or Shasta to watch the
eclipse, be sure to be aware of the bears! (Also, maybe I should get a
calendar that's a little more in tune with the sky.)
Tags: astronomy, science, eclipse
[
21:12 May 16, 2012
More science/astro |
permalink to this entry |
]
Tue, 25 Jan 2011
Eclipse has been driving me batty with all the extra spaces it adds
everywhere -- blank lines all have indents on them, and lots of
code lines have extra spaces randomly tacked on to the end.
I sure wouldn't want to share files like that with coworkers
or post them as open source.
I found lots of suggestions on the web for eliminating extra whitespace,
and several places to configure this within Eclipse,
but most of them don't do anything.
Here's the one that actually worked:
Window->Preferences
Jave->Editor->Save Actions
Enable Perform the selected actions on save.
Enable Additional actions.
Click Configure.
In the Code Organizing tab., enable
Remove trailing whitespace for All lines.
Review all the other options there, since it will all happen automatically
whenever you save -- make sure there isn't anything there you
don't want.
Dismiss the Configure window.
Review the other options under Save Actions, since these will
also happen automatically now.
Don't forget to click Apply in the Save Actions
preference page.
Whew! There are other places to set this, in various Code style
and Cleanup options, but all all the others require taking some
action periodically,
like Source->Clean up...
By the way, while you're changing whitespace preferences,
you may also want the
Insert spaces for tabs preference under
General->Editors->Text Editors.
An easy way to check whether you've succeeded in exorcising the
spaces -- eclipse doesn't show them all, even when you tell it to --
is to :set hlsearch in vim, then search for a space.
(Here are some other ways to show
spaces in vim.) In emacs, you can M-x set-variable
show-trailing-whitespace to true, but that
doesn't show spaces on blank lines; for that you might want
whitespace.el
or similar packages.
Tags: eclipse, android, programming
[
15:42 Jan 25, 2011
More programming |
permalink to this entry |
]
Tue, 07 Dec 2010
I've been doing some Android development, using the standard Eclipse
development tools. A few days ago, I pasted some code that included
a comment about different Android versions, and got a surprise:
![[The word 'Android' is not correctly spelled. Change to 'Undried'?]](http://shallowsky.com/blog/images/screenshots/undried-crop.jpg)
What do you think -- should I change all the "Android" references
to "Undried"?
Tags: humor, android, eclipse, programming
[
11:09 Dec 07, 2010
More humor |
permalink to this entry |
]
![[Annular eclipse, afocal with cellphone camera through H-alpha scope]](https://shallowsky.com/blog/images/annular-eclipse-2023/PXL_20231014_163643277.jpg)
![[2017 Solar eclipse with corona]](http://shallowsky.com/images/eclipse2017/?pic=img_1505.jpg)
![[Solar eclipse diamond ring]](http://shallowsky.com/images/eclipse2017/?pic=img_1499c.jpg)
![[Constructing a solar sight]](http://shallowsky.com/blog/images/solar-finder/img_1444.jpg)
![[Curved rod barn-door mount]](http://shallowsky.com/blog/images/barndoor/img_1410.jpg)
![[Barn-door mount, showing piano hinge]](http://shallowsky.com/blog/images/barndoor/img_1405.jpg)
![[Partial solar eclipse, with sunspots]](http://shallowsky.com/blog/images/img_1346c.jpg)
![[early stage of annular eclipse 2012, showing sunspots]](http://shallowsky.com/images/annular-eclipse-2012/img_5402.jpg)
![[black drop at end of annularity]](http://shallowsky.com/images/annular-eclipse-2012/img_5412.jpg)
![[pinhole eclipse viewing]](http://shallowsky.com/images/annular-eclipse-2012/img_5287.jpg)
![[binocular projection for eclipse]](http://shallowsky.com/images/annular-eclipse-2012//img_5283.jpg)
![[Solar annular eclipse of January 15, 2010 in Jinan, Republic of China, by A013231 on Wikimedia Commons.]](http://commons.wikimedia.org/wiki/File:Solar_annular_eclipse_of_January_15,_2010_in_Jinan,Republic_of_China.JPG)
![[eclipse viewed through leaves]](http://commons.wikimedia.org/wiki/File:IMG_1650_zonsverduistering_Malta.JPG)
![[Solar projection with a Dobsonian]](http://commons.wikimedia.org/wiki/File:Home_made_dobsonian_user_to_make_a_solar_projection_%28Split,_Croatia%29_3.jpg)
![[The word 'Android' is not correctly spelled. Change to 'Undried'?]](http://shallowsky.com/blog/images/screenshots/undried.jpg)